Adjusting the rear shocks on your ATV is a crucial aspect of optimizing its performance and ensuring a comfortable ride. These shocks play a vital role in absorbing impacts and maintaining stability, but the factory settings may not suit your individual preferences or riding conditions. By understanding the importance of proper shock adjustment and following the right steps, you can unlock the full potential of your ATV, improve handling, and enjoy a smoother, more enjoyable ride. In this blog post, we will answer whether or not can you adjust rear shock on ATVs, and also explore the significance of adjusting rear shocks on ATVs and guide you through the process to help you achieve optimal performance and comfort. So, let’s dive into the world of rear shock adjustment on ATVs and take your riding experience to new heights!
Can You Adjust Rear Shock on ATV?
Yes, you can adjust the rear shocks on your ATV. It allows you to fine-tune the suspension settings according to your preferences for better handling, control, and comfort. Locate the adjusters, make changes to compression and rebound settings, and consider factors like weight and terrain. While it may require some trial and error, seeking professional help is an option for those who are unsure. Adjusting rear shocks enhances your ATV’s performance and makes for a more enjoyable ride.
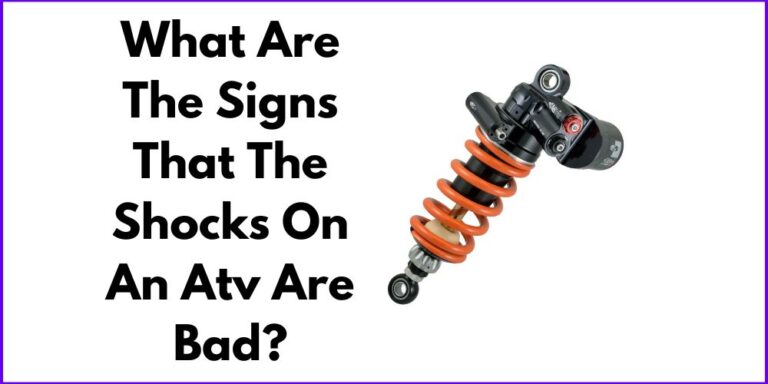
Signs That Rear Shock Adjustment is Needed
When it comes to your ATV’s performance and ride quality, the rear shocks play a crucial role. Over time, however, these shocks may require adjustment to maintain optimal functionality. Here are some common signs that indicate it’s time to adjust your rear shocks:
- Excessive Bouncing: If your ATV starts bouncing excessively after hitting bumps or uneven terrain, it’s a clear indication that the rear shocks are not adequately absorbing the impact. This can make your ride uncomfortable and reduce control.
- Bottoming Out: When the rear shocks bottom out, it means they are compressing fully and hitting their maximum limit. This occurs when the shocks can’t handle the force generated by rough terrain or when carrying heavy loads. Bottoming out not only affects your comfort but also puts additional stress on other ATV components.
- Instability and Swerving: If you notice your ATV becoming unstable and swerving more than usual, especially during turns or at higher speeds, it could be a sign of improperly adjusted rear shocks. The shocks should provide stability and keep the ATV balanced, so any deviation from this indicates the need for adjustment.
- Uneven Tire Wear: Inspect your ATV’s tires for uneven wear patterns. Excessive wear on one side or in specific areas could indicate that the rear shocks are not distributing weight evenly. This can lead to decreased tire life and compromise your ATV’s handling.
Recognizing these signs is crucial because neglecting rear shock adjustment can lead to further damage to your ATV’s suspension system and compromise your safety while riding. By addressing these issues promptly, you can ensure a smoother and more controlled riding experience.
Adjusting Rear Shocks on ATVs
Before diving into the process of adjusting rear shocks on your ATV, it’s essential to ensure you have the right tools and safety gear. Proper preparation sets the foundation for a smooth and successful adjustment. Here are a few important points to keep in mind:
- Tools: Gather the necessary tools for the adjustment process. These typically include a shock spanner wrench, a screwdriver or hex key (depending on the adjuster type), and possibly a socket set for certain models.
- Safety Gear: Don’t forget to prioritize your safety. Wear protective gloves and eye goggles to shield yourself from any potential hazards. Additionally, consider using a sturdy workbench or lift to elevate the ATV and provide a stable working platform.
- Checklist: To stay organized during the adjustment, create a checklist of items needed. This can include the tools mentioned earlier, any additional equipment specific to your ATV model, and a notepad for recording measurements or changes made during the adjustment process.
To adjust the rear shocks on your ATV, it’s important to locate the adjusters first. The adjusters are typically located near the top or bottom of the shock body and can take the form of threaded collars, knobs, or clickers. To find the exact position of the adjusters on your ATV model, refer to the owner’s manual or consult the manufacturer’s website for specific guidance.
Adjusting Compression and Rebound
Now that you’ve located the rear shock adjusters, it’s time to delve into adjusting the compression and rebound settings. These adjustments directly affect the performance and comfort of your ATV’s suspension system. Here’s a breakdown of each adjustment:
1. Compression Adjustment: Compression adjustment determines the shock’s resistance to compression forces when encountering bumps or obstacles. By altering the compression settings, you can achieve a softer or stiffer ride. Here’s a step-by-step guide for adjusting compression settings:
-
- Identify the compression adjuster on the shock.
- Use the appropriate tool to turn the adjuster clockwise to increase compression (stiffer ride) or counterclockwise to decrease compression (softer ride).
- Make incremental adjustments and test the ATV’s response after each adjustment. Continue until you find the desired compression setting.
2. Rebound Adjustment: The rebound adjustment controls how quickly the shock returns to its original position after compression. It impacts the ATV’s stability and handling. Follow these steps for adjusting rebound settings:
-
- Locate the rebound adjuster on the shock, usually positioned near the compression adjuster.
- Turn the adjuster clockwise to increase rebound damping (slower return) or counterclockwise to decrease rebound damping (faster return).
- Similar to compression adjustment, make small adjustments and test the ATV’s performance after each change. Fine-tune until you achieve the desired rebound setting.
Fine-Tuning for Rider Preferences
While the manufacturer’s recommended settings serve as a baseline, it’s crucial to consider your unique preferences as a rider. Factors like rider weight, terrain conditions, and riding style can significantly impact your ATV’s performance. Here are some tips for fine-tuning rear shock settings:
- Rider Weight: Heavier riders may require stiffer settings to prevent excessive sagging, bottoming out, or instability. Lighter riders may benefit from softer settings for improved comfort and traction. Experiment with different settings to find the right balance for your weight.
- Terrain Conditions: Adjusting rear shocks according to the terrain you primarily ride on can enhance your ATV’s performance. For rough terrains, increasing compression and rebound can provide better control and stability. On smoother terrains, reducing these settings may result in a more comfortable ride.
- Riding Style: Consider your riding style—whether you prefer aggressive, fast-paced riding or casual cruising. Adjusting rear shocks to match your style can optimize performance. Aggressive riders may opt for firmer settings, while casual riders may lean towards softer settings.
Remember, fine-tuning is an iterative process. Make small adjustments, test your ATV’s performance, and note any changes. By experimenting with different settings and carefully observing the effects, you can customize your rear shocks to suit your preferences and riding conditions.
Common Mistakes to Avoid
When adjusting rear shocks on your ATV, it’s crucial to avoid common mistakes that can hinder the effectiveness of the adjustment and impact your ATV’s performance and safety. Here are some key mistakes to watch out for and tips to ensure a successful rear shock adjustment:
- Neglecting Sag Setting: Set sag correctly to maintain proper weight distribution and ATV handling. Follow the manufacturer’s recommendations and use appropriate tools.
- Overlooking Suspension Linkage: Regularly inspect and lubricate the suspension linkage to prevent reduced suspension travel and poor shock performance.
- Ignoring Manufacturer Guidelines: Consult the ATV’s owner’s manual for recommended adjustment procedures and settings.
- Adjusting Compression and Rebound Simultaneously: Make adjustments to compression and rebound settings independently to understand their individual effects.
- Improper Adjuster Tightening: Follow torque specifications provided by the manufacturer to avoid damaging components.
- Failing to Recheck and Fine-Tune: Test your ATV in different conditions and terrain, and make small incremental adjustments as needed for optimal performance.
Avoiding these common mistakes will help you achieve a smooth and enjoyable riding experience with properly adjusted rear shocks.
Final Thoughts
In conclusion, adjusting the rear shocks on your ATV is essential for improved performance and comfort. By following the outlined steps and considering individual preferences, you can optimize your ATV’s suspension system. Remember to consult resources or seek professional help if needed. Take the time to adjust your rear shocks and enjoy a smoother, more controlled ride on your ATV.