Adjusting the shock on a dirt bike is crucial to maintaining optimal performance and control while riding off-road. A properly adjusted shock can enhance your bike’s stability, handling, and overall riding experience.
Be it a beginner or an experienced rider, understanding how to adjust the shock system is very important. In this blog post, we will delve into the process of adjusting the shock on a dirt bike, covering various aspects such as sag, compression damping, rebound damping, and fine-tuning.
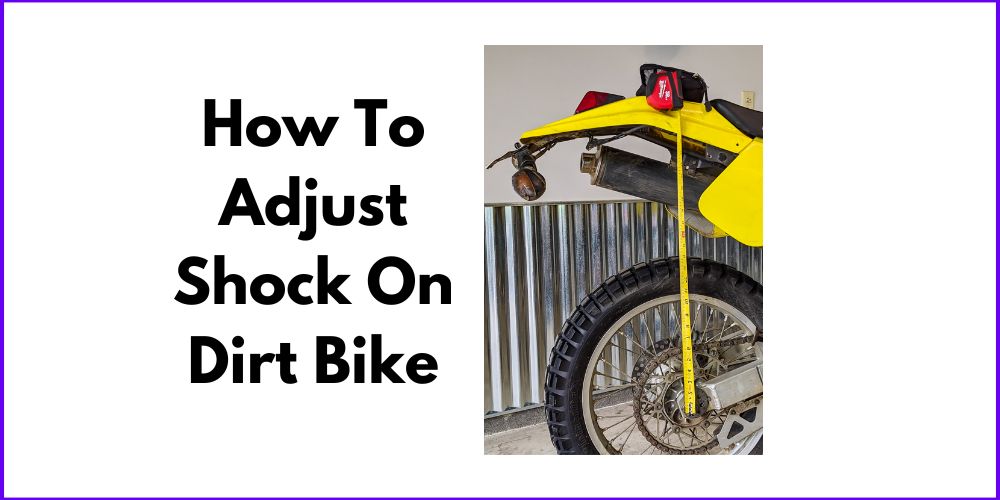
How To Adjust Shock On Dirt Bike
To adjust the shocks on a dirt bike, you will need to follow these general steps carefully:
Prepare for Shock Adjustment
It’s important to make some necessary preparations before diving into the process of adjusting the shock on your dirt bike. Ensuring your safety and having the right tools at hand will make the adjustment process smooth and efficient. Here are the key steps to prepare for shock adjustment:
- Safety Precautions: Start by wearing appropriate safety gear, including a helmet, goggles, gloves, and protective clothing. Make sure you are working in a well-ventilated area with sufficient space to move around your bike.
- Tools Required: Gather the necessary tools for the shock adjustment. These commonly include a spanner wrench or shock preload adjuster tool, a shock pump, and possibly a socket set or Allen wrenches, depending on your bike’s specific shock setup.
- Check Shock Condition: Inspect the shock for any visible damage or leaks. Ensure that all mounting bolts are tightened securely. If you notice any significant damage or suspect an issue with the shock, it’s recommended to consult a professional for inspection and potential repairs.
Adjust the Sag
The sag is crucial to shock adjustment as it determines how your dirt bike’s suspension reacts to weight transfer during riding. It affects both the bike’s stability and handling. To adjust the sag properly, follow these steps:
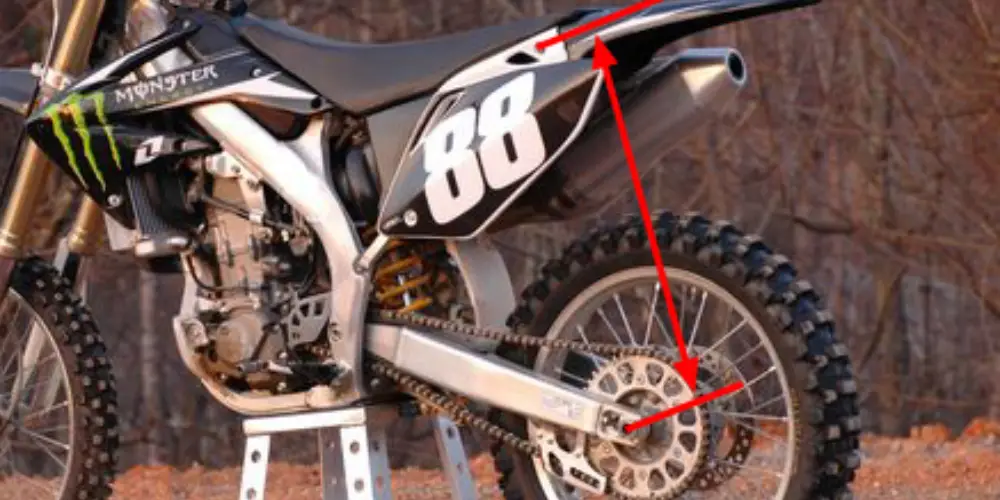
- Measure the sag: You’ll need a helper and a tape measure to measure the sag. First, lift the rear wheel off the ground and ensure the bike is level. Then, have your helper gently hold the bike in an upright position while you sit on it in your regular riding gear. With your feet on the footpegs, find a natural riding position.
- Adjust preload: With you sitting on the bike, carefully dismount while your helper keeps it steady. Measure the distance between a fixed point on the rear fender or subframe and a reference point on the rear axle. This measurement represents the sag. Compare it to the manufacturer’s recommended sag range for your bike model.
- Achieve the desired sag: If the sag measurement falls outside the recommended range, you can adjust it by increasing or decreasing the preload. Most dirt bike shocks have a preload adjustment mechanism, such as a collar or a threaded ring. Turning it clockwise increases preload, reducing sag, and turning it counterclockwise decreases preload, increasing sag.
- Recheck and Fine-tune: After making adjustments, remeasure the sag to ensure it falls within the recommended range. Repeat the process until you achieve the desired sag value. Remember that the recommended sag can vary based on riding style, terrain, and personal preference. Consult your bike’s manual or a suspension specialist for specific recommendations.
Adjust compression Damping
Compression damping plays a vital role in controlling the speed at which the suspension compresses when encountering bumps or obstacles. Adjusting compression damping allows you to fine-tune your dirt bike’s suspension to match different terrains and riding preferences. Here’s how you can adjust compression damping:
- Determine the optimal compression setting: The optimal compression setting depends on factors like rider weight, riding style, and terrain. If you prefer a softer suspension that absorbs bumps more easily, you may want to decrease compression damping. On the other hand, increasing compression damping might be appropriate if you’re looking for a firmer and more responsive suspension.
- Adjust compression damping: Locate the compression damping adjustment knob or screw on your dirt bike’s shock. This adjustment is typically found at the top or bottom of the shock body. Turning the knob clockwise generally increases compression damping, while turning it counterclockwise decreases it. Make incremental adjustments, starting with a few clicks at a time, and test the bike’s performance after each adjustment.
- Test and Fine-tune: Take your dirt bike for a ride on the terrain you typically encounter. Pay attention to how the suspension feels when hitting bumps or jumps. If the suspension feels too harsh or rigid, consider decreasing compression damping. Try increasing compression damping if it bottoms out too easily or feels excessively soft. Fine-tune the settings until you achieve a balanced and comfortable ride.
Adjust Compression Damping
Compression damping plays a crucial role in controlling the speed at which your dirt bike’s suspension compresses when encountering obstacles or rough terrain. Adjusting compression damping can fine-tune the suspension’s response and improve your bike’s overall performance. Here’s a step-by-step guide to adjusting compression damping:
- Determine the optimal compression setting: The optimal compression damping setting depends on factors such as your riding style, weight, and the type of terrain you’ll be riding on. A softer compression setting allows for more absorption of bumps and a smoother ride, while a firmer setting provides more stability and responsiveness.
- Locate the compression damping adjuster: Identify the compression damping adjuster on your dirt bike’s shock. It is typically a knob or screw located at the top or bottom of the shock body. Consult your bike’s manual if you’re having trouble finding it.
- Make adjustments: Start with the compression damping adjuster in its default or middle position. Make small incremental adjustments, turning the knob or screw in either direction to increase or decrease compression damping. It’s recommended to make one-click adjustments at a time.
- Test and Fine-tune: Take your dirt bike for a ride on a familiar terrain that represents the conditions you usually encounter. Pay attention to how the suspension feels when going over bumps, jumps, or rough sections. If the suspension feels too soft and bottoms out easily, increase the compression damping by turning the adjuster clockwise. Conversely, if the suspension feels too firm and doesn’t absorb impacts well, decrease the compression damping by turning the adjuster counterclockwise.
- Iterative process: Continue making small adjustments and testing the bike’s performance until you find the compression damping setting that provides the desired balance between comfort, stability, and responsiveness.
Adjust rebound Damping
Rebound damping controls how quickly your dirt bike’s suspension extends after compressing, ensuring it returns to its original position smoothly and efficiently. Adjusting rebound damping is crucial for maintaining control and stability during rides. Here’s a step-by-step guide on how to adjust rebound damping:
- Determine the optimal rebound setting: The ideal rebound damping setting depends on factors such as rider weight, riding style, and terrain conditions. A slower rebound damping setting provides more control and stability, while a faster setting enhances the bike’s ability to react quickly to successive impacts.
- Locate the rebound damping adjuster: Locate the rebound damping adjuster on your dirt bike’s shock. It is typically a knob or screw positioned at the top or bottom of the shock body. Refer to your bike’s manual if unsure about its location.
- Making adjustments: Begin with the rebound damping adjuster in its default or middle position. Like with compression damping, make small incremental adjustments, turning the adjuster knob or screw clockwise or counterclockwise. One-click adjustments at a time are recommended.
- Test and Fine-tune: Take your dirt bike for a ride on a familiar terrain that reflects your usual riding conditions. Pay attention to how the suspension behaves after compressing and how quickly it rebounds. If the suspension feels too slow to extend, causing the bike to feel sluggish or has reduced traction, increase the rebound damping by turning the adjuster clockwise. If the suspension rebounds too quickly, causing the bike to feel bouncy or uncontrollable, decrease the rebound damping by turning the adjuster counterclockwise.
- Iterative Process: Continue making small adjustments and testing the bike’s performance until you find the rebound damping setting that provides the desired balance of control, stability, and responsiveness.
Fine-Tune the Shock
After adjusting the sag, compression damping, and rebound damping, fine-tuning the shock further allows you to optimize its performance according to your specific riding style, terrain, and personal preferences. Here are some steps to fine-tune your dirt bike’s shock:
- Make small adjustments: Start by making small incremental adjustments to the sag, compression damping, or rebound damping. Making changes one click at a time allows you to gauge the impact of each adjustment more accurately.
- Observe the effects: Pay close attention to how the bike handles and feels during your rides. Notice how it responds to different types of terrain, jumps, and corners. Consider factors such as stability, traction, and overall comfort.
- Document changes: Keep a record of the adjustments you make, including the number of clicks or the position of the adjusters. This documentation helps you remember the changes you’ve made and their effects, making it easier to revert to previous settings or make further fine-tuning adjustments if needed.
- Consider riding style and terrain: Take into account your riding style and the types of terrain you frequently encounter. For example, if you ride aggressively or primarily on rough, technical trails, you might prefer a stiffer suspension setup. On the other hand, if you ride more casually or encounter smoother trails, a softer setup might be more suitable.
Maintenance and Inspection
Proper maintenance and regular inspection of your dirt bike’s shock system are essential for ensuring its longevity, optimal performance, and safety. Here are some key aspects to consider for maintenance and inspection:
- Cleaning: Regularly clean the shock system to remove dirt, mud, and debris that can accumulate during rides. Use a soft brush, mild detergent, and water to clean the shock body, reservoir, and other components. Avoid using high-pressure water, as it can damage seals or push contaminants into the shock.
- Lubrication: Apply lubrication to the necessary parts of the shock system as recommended by the manufacturer. This includes pivot points, bushings, and seals. Use appropriate lubricants that are compatible with the components of your shock. Avoid over-lubricating, as excess lubrication can attract dirt and affect performance.
- Inspection for Damage: Regularly inspect the shock system for any signs of damage or wear. Check for oil leakage around the shock body, reservoir, or seals, as it may indicate a problem. Inspect the shock body for dents, cracks, or any other visible damage. Pay attention to the condition of the springs, adjusters, and mounting points.
- Seals and Bushings: Check the seals and bushings for any signs of wear or deterioration. Damaged or worn-out seals can lead to oil leakage and affect the shock’s performance. Replace them if necessary. Inspect the bushings for excessive play or wear, as they contribute to the smooth operation of the shock.
- Spring Tension: Regularly check the tension of the springs. Ensure they are properly adjusted and aligned. If you notice any issues with the spring tension, consult the bike’s manual or seek professional assistance for proper adjustment.
- Suspension Specialist: Consider consulting a suspension specialist for professional servicing and tuning of your shock system. They have the expertise and specialized tools to thoroughly disassemble, inspect, and service the shock. Professional servicing can address internal issues, perform necessary adjustments, and optimize the shock’s performance.
- Follow Manufacturer’s Recommendations: Always follow the maintenance recommendations provided by the manufacturer in the bike’s manual. They provide specific guidelines and intervals for tasks such as oil changes, seal replacement, and overall servicing.
Final Words
Properly adjusting the shock on your dirt bike is crucial for optimizing its performance and ensuring a smooth and controlled ride. You can fine-tune the suspension to suit your riding style, weight, and terrain conditions by adjusting the sag, compression damping, and rebound damping.
When adjusting the shock, remember to start with small incremental adjustments and test the bike’s performance after each change. Keep track of the adjustments made and their effects to help guide future adjustments and maintain a record of optimal settings.