When it comes to off-road adventures, UTVs (Utility Task Vehicles) are the go-to choice for many enthusiasts. These rugged machines are built to handle rough terrains and provide thrilling rides. One crucial component that ensures a smooth and controlled UTV experience is the coil shock spring.
UTV coil shock springs play a vital role in the suspension system of these vehicles. They are designed to absorb the impact from bumps, jumps, and rough surfaces, providing stability and comfort to the driver and passengers. However, over time, these springs can wear out, affecting the UTV’s performance and compromising safety.
Regular maintenance and timely replacement of coil shock springs are of utmost importance to ensure optimal performance and safety during off-road adventures. Neglecting this essential aspect of UTV maintenance can result in reduced suspension efficiency, increased wear on other components, and an uncomfortable ride.
In this comprehensive guide, we will walk you through the process of replacing UTV coil shock springs. Whether you’re a seasoned UTV enthusiast or a novice looking to take charge of your vehicle’s maintenance, this step-by-step guide will equip you with the knowledge and skills needed to keep your UTV’s suspension system in top shape.
So, let’s dive in and explore how you can replace UTV coil shock springs and unleash the full potential of your off-road adventures!
How to Replace UTV Coil Shock Springs
Gathering the Necessary Tools and Materials:
Before diving into the process of replacing UTV coil shock springs, it’s crucial to gather the necessary tools and materials. Having everything prepared in advance will make the task more efficient and ensure a smooth replacement process. Here is a comprehensive list of what you’ll need:
Tools:
-
- Socket wrench set
- Torque wrench
- Allen wrenches
- Pliers
- Screwdrivers (flathead and Phillips)
- Pry bar or large screwdriver (for leverage)
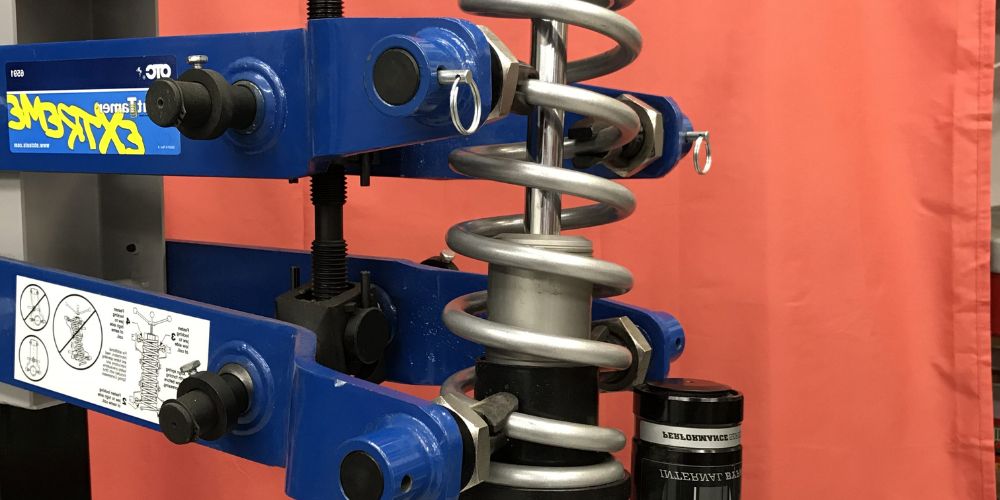
- Spring compressor tool (if required)
- Rubber mallet or dead blow hammer
- Wire brush or cleaning rag
Materials:
-
- New coil shock springs (compatible with your UTV model)
- Thread-locking compound
- Lubricating grease
- Cleaning solvent or degreaser
- Safety goggles
- Gloves (mechanic-grade or protective)
- Work gloves (for handling springs)
- Safety jack or lift
- Jack stands (for added stability)
- Wheel chocks (to prevent vehicle movement)
- Wheel lug nut key or wrench
Preparing the UTV for Spring Replacement:
Once you have all the necessary tools ready, it’s time to prepare your UTV for the spring replacement process. Here are a few important steps to follow:
-
Step-by-step Wheel Removal:
- Loosen the lug nuts: Use a lug nut key or wrench to loosen the lug nuts of the wheel you’ll be working on. Do not fully remove them at this stage.
- Lift the UTV: Position the safety jack or lift under the UTV’s frame or designated lifting points. Lift the UTV until the wheel is off the ground. Place jack stands under the frame for added stability.
- Remove the lug nuts: Fully remove the lug nuts and carefully take off the wheel from the hub.
-
Accessing the Coil Shock Spring Assembly:
- Locate the coil shock spring: Identify the coil shock spring assembly, which is usually connected to the suspension arm or strut.
- Inspect the assembly: Take a moment to inspect the assembly and familiarize yourself with the components, including the spring retainer and any retaining bolts or clips.
- Determine the necessary steps: Depending on your UTV model, you may need to remove additional components or disconnect certain parts to access the coil shock spring assembly. Follow the manufacturer’s instructions or refer to a service manual for guidance.
By following these steps, you’ll be well-prepared with the required tools and materials, and you’ll have ensured the necessary safety precautions. Now, you’re ready to proceed with the removal and replacement of the UTV coil shock springs.
Removing the Old Coil Shock Spring:
When it comes to replacing the coil shock spring on your UTV, the first step is to remove the old spring. This process involves two key steps: unbolting the spring retainer and detaching the coil shock spring itself.
1. Unbolting the Spring Retainer: To begin, locate the spring retainer bolts on the shock assembly. These bolts secure the spring in place and need to be removed carefully. Use the appropriate tools, such as a socket wrench or spanner, to loosen and remove the bolts. Take note of their positioning and keep them in a safe place, as you will need them later for the installation of the new spring.
It is essential to handle the removed components with care. Avoid dropping or damaging them, as this could impact the installation process and potentially compromise the performance of your UTV’s suspension system. Consider storing the removed components in a clean and organized manner to prevent any mix-ups or loss.
2. Detaching the Coil Shock Spring: Once the spring retainer bolts are removed, you can proceed to detach the old coil shock spring from the shock assembly. Carefully slide the spring off the assembly, ensuring that you have a firm grip and maintain control over it at all times. It’s important to note that coil shock springs are under tension and can exert force when released. Take caution to avoid any injuries while removing the old spring.
Installing the New Coil Shock Spring:
After successfully removing the old coil shock spring, it’s time to prepare and install the new spring. This process involves two crucial steps: preparing the new spring and attaching it securely to the shock assembly.
- Preparing the New Spring: Before installing the new coil shock spring, thoroughly inspect it for any defects, damage, or deformities. Ensure that it matches the specifications of your UTV’s suspension system. Clean the spring using a mild detergent and water, removing any dirt or debris that may have accumulated during storage or transportation. Once cleaned, apply a suitable lubricant to the spring to enhance its performance and prevent rusting or corrosion.
- Attaching the New Coil Shock Spring: Begin by carefully sliding the new coil shock spring onto the shock assembly, aligning it properly. Follow the manufacturer’s guidelines and instructions for the specific model of your UTV to ensure correct installation. Take note of any recommended torque specifications for tightening the spring retainer bolts.
Using the previously removed spring retainer bolts, secure the new spring in place by tightening the bolts evenly. Ensure that they are tightened to the recommended torque to maintain proper suspension function. Double-check the alignment and stability of the new spring before proceeding to the next steps of reassembling your UTV’s suspension system.
By following these steps, you can safely remove the old coil shock spring and replace it with a new one. Remember to handle the components with care, thoroughly inspect the new spring, and follow the manufacturer’s guidelines for a successful installation. With a properly replaced coil shock spring, your UTV will be ready to conquer any off-road challenges that come its way.
Reassembling the UTV Suspension:
Once the coil shock spring replacement is complete, reassembling the UTV suspension system is crucial to restore stability and performance. Follow these steps:
Reattaching the Spring Retainer:
- Align and thread the spring retainer bolts into their designated holes.
- Tighten the bolts to the recommended torque, following a diagonal pattern.
Mounting the Wheel:
- Slide the wheel onto the wheel hub and align the lug nut holes.
- Thread and tighten the lug nuts gradually, following the manufacturer’s torque specification.
- Double-check the tightness of the lug nuts for security.
Testing and Post-Installation Considerations:
- Test the UTV’s suspension system on varied terrain, noting any issues.
- Adjust suspension settings if needed, referring to the manufacturer’s manual.
- Maintain the coil shock springs by cleaning them, inspecting for wear or damage, and following the recommended maintenance schedule.
By reassembling the UTV suspension properly and conducting thorough testing, you can ensure a safe and optimized off-road experience.
Final Thoughts
To summarize, replacing UTV coil shock springs involves removing the old spring, installing a new one, and reassembling the suspension system. Regular maintenance and timely replacement are essential for optimal performance. Prioritize routine inspections and follow the manufacturer’s maintenance schedule to prolong the lifespan of the springs. A well-maintained suspension system ensures a smoother and safer off-road experience. Consult the manufacturer’s manual for specific instructions and torque specifications.