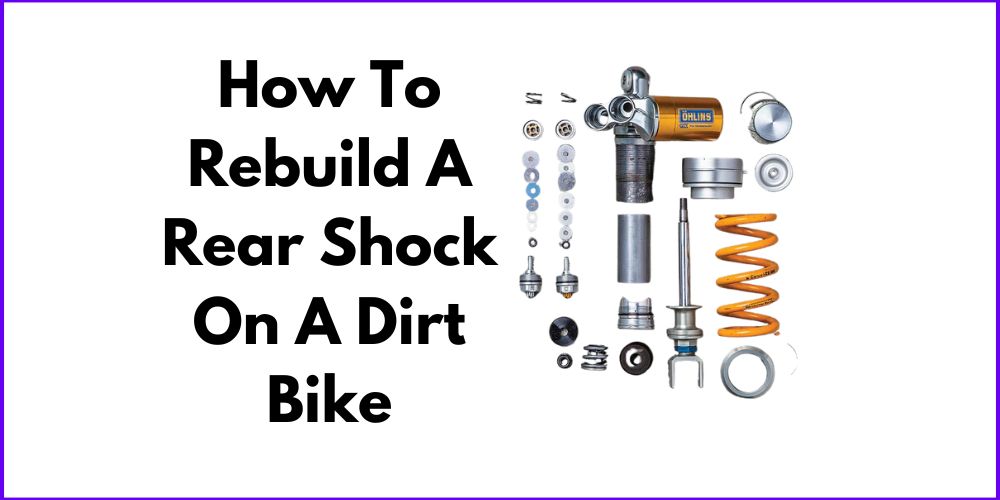
Maintaining and rebuilding the rear shock on your dirt bike is essential for optimal performance and longevity. As the component responsible for absorbing impacts and providing stability, a well-maintained rear shock ensures a smooth and controlled ride. Luckily, Rocky Mountain offers the necessary parts and tools for this task. In this blog post, we’ll provide a step-by-step guide on how to rebuild a rear shock on a dirt bike, ensuring you have the knowledge and resources to keep your ride in top shape. Let’s get started and learn how to achieve a smooth and enjoyable off-road experience!
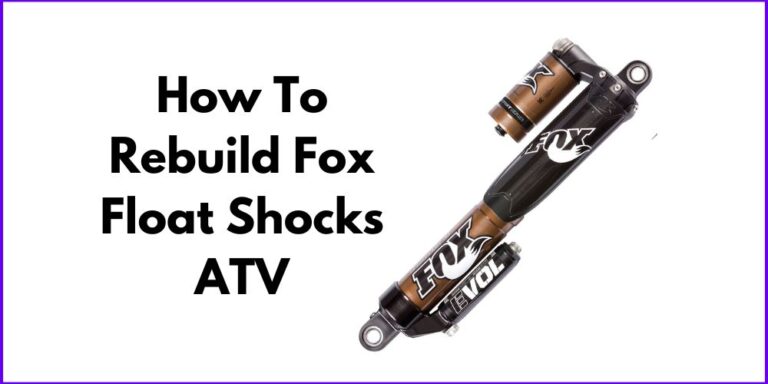
How To Rebuild A Rear Shock On A Dirt Bike
Preparation:
Before diving into the process of rebuilding your dirt bike’s rear shock, it’s important to gather the necessary tools and make some initial preparations. Here’s a list of general tools you’ll need for the rebuild:
- Socket set
- Wrenches
- Screwdrivers (both flathead and Phillips)
- Pliers
- Hammer
- Punch
- Rag or towel
- Safety glasses
- Contact cleaner or degreaser
- Clean pan or container for draining oil
- Compressed air or air pump
In addition to these general tools, there are a few specialty tools that will come in handy during the rebuild. These tools include:
- Tusk Seal Bullet: This tool helps in removing the sharp edge on the shock shaft, preventing damage to the new seal during installation.
- Race Tech Seal Head Setting Tool: Used to push down the seal head and reveal the circlip that holds it in place, making it easier to remove and replace.
- Tusk Shock Preload Adjusting Tool: Specifically designed to adjust the preload on the shock spring, allowing you to set it according to your preference and riding style.
- Tusk Shock Reservoir Cap Removal Tool: If your shock has a centered valve stem, this tool helps in easily removing the cap and bladder from the reservoir.
Once you have the necessary tools, it’s time to prepare your bike for the rebuild. Here are the initial steps to follow:
- Remove the exhaust: Loosen the top lock nut of the shock and spray some oil on the threads. This makes it easier to loosen the nut while the shock is still on the bike. Take off the exhaust to gain better access to the shock.
- Remove the seat: Depending on your dirt bike model, you may need to remove the seat to access the shock and work comfortably during the rebuild.
- Remove the tank: Loosen the air boot on the back of the carburetor, and then loosen the lower subframe bolts. Remove the upper subframe bolt to allow the subframe to drop back, providing better access to the shock.
By following these initial steps and having the necessary tools at hand, you’re now ready to proceed with the rear shock rebuild process. In the next sections, we’ll cover the disassembly, cleaning, and reassembly steps in detail. So let’s continue and bring back the optimal performance of your dirt bike‘s rear suspension!
Removing the Rear Shock:
To begin the process of rebuilding your dirt bike’s rear shock, we first need to remove it from the motorcycle. This will allow us better access for disassembly and reassembly. Follow these steps to safely remove the rear shock:
- Loosen the top lock nut: Start by spraying a little oil on the threads of the top of the shock and then loosening the top lock nut. Doing this while the shock is still on the bike makes it easier to handle.
- Create space for access: To gain better access, remove the exhaust, seat, and tank. Loosen the air boot on the back of the carburetor, and then loosen the lower subframe bolts. Finally, remove the upper subframe bolt completely. This will allow the subframe to drop back slightly, providing improved access to the shock.
- Remove the lower bolt and nut: Once the subframe is adjusted, remove the lower bolt and nut from the shock. As you do this, the swing arm will drop, allowing you to remove the nut, washer, and bolt from the upper shock.
- Ensure safety and measure shock spring length: Prior to further disassembly, put on safety glasses to protect your eyes. Additionally, take the opportunity to measure the length of the shock spring. This measurement will make it easier to set the sag correctly later on.
Disassembling the Rear Shock:
Now that the rear shock is removed from the motorcycle, it’s time to disassemble it for inspection and rebuilding. Follow these steps to disassemble the shock:
- Release nitrogen from the shock reservoir: Begin by releasing the nitrogen from the shock reservoir. This can be done using a valve or other release mechanism specific to your shock model.
- Remove the seal head: Start by loosening the lock nut on the shock, followed by pushing the spring. This can be done by twisting the spring in a vise or by hand. Once loose, push it the rest of the way back with your finger. Then, move the rubber bumper down to reveal the retaining ring. Remove the retaining ring that holds the spring in place.
- Different procedures for Kayaba and Showa shocks: If you’re working with a Kayaba shock, you’ll find a seal cover at the bottom. Use a punch to tap on the holes in the cover to remove it, revealing the dust seal and seal head. For Showa shocks, you’ll need to separate the retaining collars by knocking them loose from each other and remove the small circlip to reveal the spring.
- Clean the shock components: Regardless of the shock type, it’s crucial to clean all the disassembled parts thoroughly. Use contact cleaner and a rag to clean the seal head, dust seal, and shock body. This cleanliness will facilitate the rest of the rebuilding process.
Rebuilding the Rear Shock:
Now that the shock is disassembled and clean, it’s time to rebuild it and restore its performance. Follow these steps to rebuild your rear shock:
- Assembly of the shock: Start by installing the piston and valve stack back into the shock body. Use a rag and tape to hold them together securely as you slide them onto the shock shaft. Take care not to mix up the washers as they control the valving. Then, install the seal body and cap, ensuring the threads are clean and properly aligned.
- Installing the new seal head assembly or replacing individual seals: Depending on the condition of your shock, you can either install a new seal head assembly or replace individual seals and dust seals. Follow the manufacturer’s instructions for your specific shock model. Grease the new dust seal and press it onto the seal body. Install the washer, oil seal, and rubber o-ring to complete the assembly.
- Grinding the peened edge and securing the nut: Before attaching the lock nut, grind the peened edge off it. This will allow for easier removal during future maintenance. Then, secure the lock nut properly using the recommended torque specification for your shock.
- Filling the shock with oil and pressurizing the bladder: Fill the shock body with the specified oil, leaving room for the bladder. Next, clean the bladder, ensuring there are no contaminants or leaks. Install the bladder cap, making sure it’s tightened securely. Finally, pressurize the bladder to the manufacturer’s recommended pressure using a shock pump.
- Pushing the seal head into the shock body: Gently push the seal head into the shock body while ensuring it aligns properly. Once in place, secure it with a circlip. Take care not to damage the seal head or shock body during this process.
- Releasing air pressure, filling with nitrogen, and proper installation: Release the air pressure from the bladder and fill the shock with nitrogen to the recommended pressure. Finally, ensure the shock is properly installed back on the bike according to the manufacturer’s instructions.
By following these steps, you’ll be able to rebuild your dirt bike’s rear shock, ensuring optimal performance and a smooth off-road experience. Stay tuned for the next section, where we’ll cover the importance of setting sag and fine-tuning your shock settings.
Final Thoughts
In conclusion, rebuilding the rear shock on your dirt bike is a vital task for maintaining optimal performance. Here’s a brief summary of the steps involved: remove the shock, disassemble it by releasing nitrogen and removing the seal head, clean the components, and rebuild the shock by installing new parts.